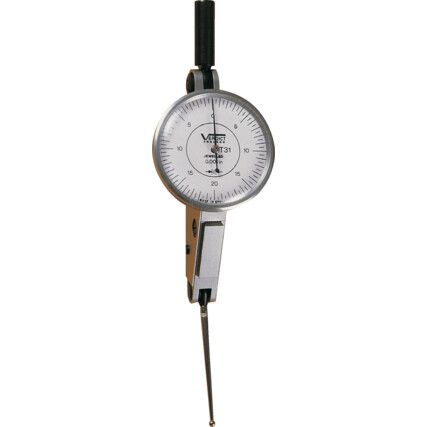
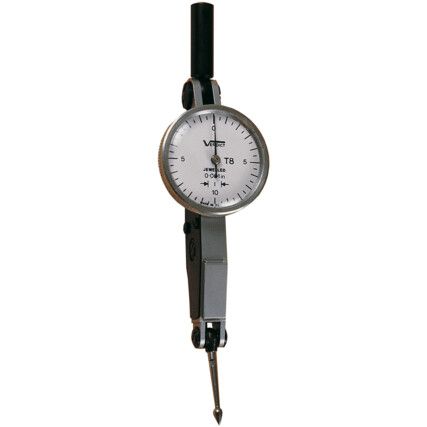
Dial Test Indicators
Dial test indicators - otherwise known as DTI gauges - are highly accurate measuring devices used commonly throughout a wide range of professional industrial applications.
Cromwell stocks multiple types of dial test indicators from trusted brands such as Verdict®, Tesa®, Mitutoyo®, and more.
What are dial test indicators?
Dial test indicators are a basic tool used for building, fixing and calibrating machines. It is used for making extremely fine measurements that can indicate whether machines have been made or calibrated correctly.
Dial test indicators gather accurate readings by using an extremely sensitive arm that sweeps at an angle. It measures exactly how far the arm is pushed sideways to provide an accurate reading on relative motion. In simpler terms, they are used for converting miniscule lateral movements into a rotary dial reading.
Why a dial test indicator?
Dial test indicators excel at providing highly accurate readings in metric (mm) or imperial (in) measurements.
Whilst it does not provide a solid measurement (such as length, width, etc.) a dial test indicator effectively measures the distance between a desired position and the actual position. Put simply, if you're asking, "how tall is this part?" you'd need a ruler or a scale.
DPI gauges answer the question "how tall is this part compared to this other part" or "how tall is this part compared to how tall it should be".
When are dial test indicators used?
Accuracy and reliability are of paramount importance to mechanical engineers, who value dial test indicators when ensuring tools are properly aligned.
• Lathe Work - Having an accurate measuring device allows engineers to position work in the lathe chuck with pinpoint accuracy. Additionally, DTI gauges are used for aligning the tailstock on a lathe.
• Vice Calibration - DTI gauges are useful when it comes to setting up vices, as they can ensure the jaw is square with the travel of the vice. To do this, sweep the arm of the dial test indicator directly over the jaw as you move it in the direction of travel. The DTI gauge will then precisely measure how far off square the jaw is. You'll be able to verify the squareness of your vice when the indicator doesn't move.
These are the two most common measuring applications regularly performed by a DTI gauge, yet they can be used all around the workshop. If you need help picking the right tools for your profession or hobby, ask our experts for personalised advice.
Types of dial test indicator
When purchasing a dial test indicator, you have two configurations to pick from:
• Analogue DTI Gauge - The standard, most common form of dial test indicator.
• Digital DTI Gauge - A newer form of dial test indicator that provides easily-readable information at a glance but comes with battery and reliability concerns over the traditional analogue models.
When researching dial test indicators, you're likely to come across results for 'dial indicators'. Whilst functionally similar in the way they work, they're used to measure different things. Both are useful; however most engineers find the dial test indicator to be more useful.
• Dial Test Indicator - Often referred to as a 'test' indicator. The measuring arm sweeps horizontally, measuring how far it is pushed in relative motion.
• Dial Indicator - Often called a 'travel' or 'plunge' indicator. The measuring arm on a dial indicator is referred to as a plunger, as it only measures upward pressure with a linear vertical 'plunging' motion. Has a bulkier design that may be harder to use in awkward places, and is not as accurate as a dial test indicator.
Considerations when choosing a dial test indicator
• Magnetic Stand - DTI gauges are commonly used with a magnetic stand to secure the indicator exactly where it's needed. These stands allow for ultra-fine adjustments, allowing you to easily zero the gauge.
• Accuracy - Dial test indicators come with a variety of accuracies to choose from - the more precise the measurement, the more expensive the DTI gauge. Most DTI gauges have an accuracy of 0.0254mm (0.001") however some are even more precise.
• Imperial vs. Metric - Chances are you'll want metric measurements, but a few old school workshops may value imperial measurements. A few DTI gauges are available with both, although these can be hard to find.
Dial test indicator jargon buster
We want to make it easier for you to understand the technical terms when purchasing a dial test indicator. Here are a few of the key terms used when referring to DTI gauges.
• Turn counter - This is the smaller dial on the face of the DTI gauge that counts how many times the dial has completed a 360 degree turn.
• Stylus - Another term for the arm, A.K.A the part that moves across the surface to provide a measurement figure.
FAQs
How to use dial test indicator?
First of all, ensure your DTI gauge is accurately calibrated, and fitted to a magnetic arm if required. Set the gauge at the angle you'd like (typically 12 degrees, although this varies depending on gauge manufacturer), then set the face to read 0. The surface can now be moved, and the DTI gauge will provide a relative reading as the stylus travels along the surface/object.
How to calibrate dial test indicator?
You can easily rotate the face of most DTI gauges until the 0 mark aligns with the dial. Once this has been done, simply lock the face into position to keep it consistent.

